What Are the Basics of Building a Diy Pond?
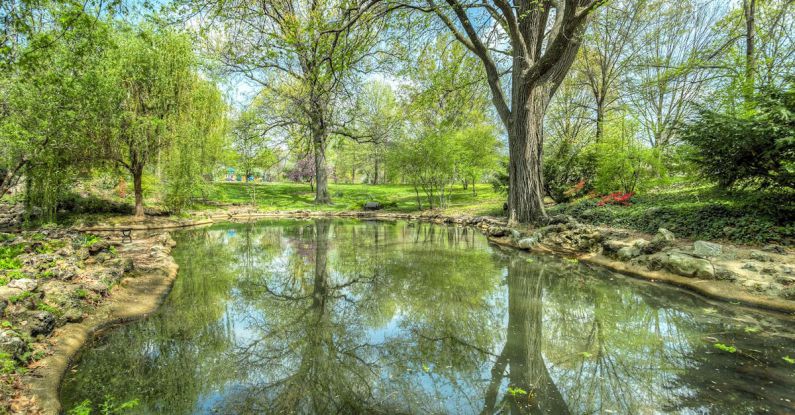
Creating a serene backyard oasis with a DIY pond can be a rewarding and enjoyable project for any homeowner. Not only does it add a touch of nature to your outdoor space, but it also provides a peaceful retreat where you can relax and unwind. While the idea of building a pond may seem daunting at first, with the right guidance and tools, you can easily bring your vision to life. In this article, we will explore the basics of building a DIY pond, from planning and design to installation and maintenance.
Planning and Design
Before you start digging, it’s essential to carefully plan and design your DIY pond. Consider the size and shape of the pond, taking into account the available space in your backyard. Think about whether you want a formal or natural-looking pond, as this will influence the design elements you choose. Additionally, decide on the location of the pond, keeping in mind factors such as sunlight exposure and proximity to trees.
Excavation
Once you have finalized your pond design, it’s time to start digging. Use a rope or hose to outline the shape of the pond on the ground, then begin excavating the area. Make sure to dig to the desired depth, allowing for a deeper section that can accommodate fish and other aquatic life. As you dig, be mindful of the slope of the pond banks, ensuring a gradual incline to prevent erosion and provide easy access for wildlife.
Lining and Edging
After excavating the pond, it’s crucial to line it with a durable and waterproof material to prevent leaks and maintain water quality. PVC or rubber liners are popular choices for DIY ponds, as they are flexible and easy to install. Carefully lay the liner in the excavated area, smoothing out any wrinkles or folds to create a seamless barrier. Once the pond is lined, add decorative rocks or edging around the perimeter to enhance its visual appeal and provide a natural transition to the surrounding landscape.
Filtration and Circulation
To keep your DIY pond clean and healthy, proper filtration and circulation are essential. Install a filtration system, such as a pump and filter, to remove debris and maintain water clarity. Consider adding a water feature, such as a fountain or waterfall, to promote oxygenation and enhance the aesthetic of the pond. Regularly check and clean the filtration system to ensure optimal performance and prevent algae growth.
Planting and Stocking
Adding aquatic plants and fish to your DIY pond can further enhance its beauty and ecosystem. Choose a variety of water plants, such as lilies and submerged oxygenators, to provide shelter for fish and promote water quality. When stocking fish, opt for species that are well-suited to the size and depth of your pond, ensuring they have ample space to thrive. Introduce fish gradually to prevent overcrowding and monitor water quality regularly to maintain a balanced ecosystem.
Maintenance and Care
Once your DIY pond is up and running, it’s important to establish a routine maintenance schedule to keep it in optimal condition. Regularly check the water quality, pH levels, and filtration system to ensure a healthy environment for aquatic life. Remove debris, such as fallen leaves and algae, from the surface of the pond to prevent clogging and maintain water clarity. Additionally, trim and prune aquatic plants as needed to prevent overgrowth and maintain a balanced ecosystem.
In conclusion, building a DIY pond is a rewarding project that can transform your backyard into a tranquil retreat. By following the basics outlined in this article, you can create a beautiful and sustainable pond that brings joy and relaxation to your outdoor space. Remember to plan carefully, design thoughtfully, and maintain regularly to enjoy the benefits of your DIY pond for years to come.